Monday, July 25, 2011

"Super" Gift Idea

Here is how this random project came about: Tyler and I were invited to a Ever's 2 year old birthday party this weekend and I was determined to bring my A-game in the gift department! You see being the only child of model/photographer/musician parents meant that I didn't think a normal monogrammed beach bag was going to do the trick! So I decided to think outside the box on this one and what did I come up with? Duh, what kid doesn't need a superhero cape?! I'm not talking about a generic, cheap shiny fabric kind of cape, I'm talking about a personalized, washable, you can play in this thing until your face falls off kind of cape!


So Saturday morning, with my 40% off coupons in tow, I marched over to Joann's and made the magic happen. I picked up 1 yard of solid colored broad cloth, 1 yard of fun printed fabric, Velcro squares, 2 colors of felt, and some good ole "friendship bracelet" thread. Yes, I still refer to cross stitching thread as friendship bracelet thread.


Next up, I stole one of Tyler's ugly old king sized pillowcases from his bachelor days and did my best to make a template from scratch. I took it over to Blair's house so I could test it out on her 2 year old daughter and it seemed to work pretty well. So I headed back to the studio (aka my dining room) and started working away. I traced and cut out both pieces of fabric, sewed them together (good side to good side), then flipped it so that it had the good sides faced out. Next, I pressed the seams, did a finishing stitch all the way around and sewed on the Velcro for the neck.
I hired Tyler for the next part, he used his master geometry/drawing/cutting skills to create and cut out a perfectly symmetrical capital E and a not so symmetrical but equally awesome starburst. I used my cool friendship bracelet thread to secure the E and then used a zig-zag stitch for the starburst. And TA-DA it was finished!


 I am not going to lie, I think Tyler and I were way more excited about this thing than the birthday boy ever could be and even Strongbow begged and pleaded to try it on!

 
If you need a superhero cape for your next event let me know and I bet I can make it happen!

Sunday, July 10, 2011

Southern Living Night

It took me about 2 years of begging but about a month ago I finally got the coveted invite to my friend Blair's big Southern Living night. You see Blair's aunt and uncle, Betty and Bob, live in Millbrook, AL and every so often will whip up a few of Southern Living's most recent recipes and vote on the best ones. I say whip up but I mean slave over the stove for an entire Sunday. Go check out Blair's blog post and read all the details and recipes from our big night.

So in honor of Blair and her family Tyler and I tried our own little Southern Living night. Blair has given me a subscription to the magazine for about 3 years now and I every month I flip through it and mark the recipes, then quickly forget about them. Not tonight....

picture via Southern Living

Let me tell you, the Grilled Chicken with Fresh Corn Cakes in the July 2011 issue is quite tasty! Allow me to share...

Grilled Chicken with Fresh Corn Cakes
Serves 4

Ingredients

3 lemons
2 garlic cloves, pressed
1/3 cup olive oil
1 teaspoon Dijon mustard
1/4 teaspoon pepper
1 1/2 teaspoons salt, divided
3 skinned and boned chicken breasts
3 ears fresh corn, husks removed
1 tablespoon olive oil
1 (6-oz.) package buttermilk cornbread mix
1/4 cup chopped fresh basil
8 cooked thick hickory-smoked bacon slices (I crumbled mine)
2 cups loosely packed arugula

Preparation

1. Preheat grill to 350° to 400° (medium-high) heat. Grate zest from lemons to equal 1 Tbsp. Cut lemons in half; squeeze juice from lemons into a measuring cup to equal 1/4 cup.

2. Whisk together lemon zest, lemon juice, garlic, next 3 ingredients, and 1 tsp. salt. Reserve 1/4 cup lemon mixture. Pour remaining lemon mixture in a large zip-top plastic freezer bag; add chicken. Seal and chill 15 minutes, turning once. Remove chicken from marinade, discarding marinade.

3. Brush corn with 1 Tbsp. olive oil; sprinkle with remaining 1/2 tsp. salt.

4. Grill chicken and corn at the same time, covered with grill lid, 20 minutes, turning chicken once and turning corn every 4 to 5 minutes. Remove chicken, and cover. Hold each grilled cob upright on a cutting board, and carefully cut downward, cutting kernels from cob.

5. Stir together cornbread mix and 2/3 cup water in a small bowl until smooth. Stir in basil and 1 cup grilled corn kernels. Pour about 1/4 cup batter for each corn cake onto a hot, lightly greased griddle. Cook cakes 3 to 4 minutes or until tops are covered with bubbles and edges look dry and cooked; turn and cook other side.

6. Thinly slice chicken. To serve, place 2 corn cakes on each plate, top with chicken and 2 bacon slices. Toss arugula with reserved lemon mixture. Place arugula on bacon, and sprinkle with corn kernels.


Friday, July 8, 2011

The Schnozberries Taste Like Schnozberries

Well, more like the blueberries taste like blueberries! My 4th of July weekend was full of blueberries I tell you, full of um! You see, my parents have this lake house, and at this lake house are about 8 HUGE blueberry bushes. This means that every summer my mom and I wake up early before the heat sets in and pick blueberries until our faces fall off. Give us about 20 minutes and we will have about 10 cups worth, no lie.


So a few weeks ago, I decided to make some blueberry jam. Little did I know that a little pectin goes a long way, i.e. my jam was about twice as tough as a Jello shot! A non-alcoholic Jello shot of course! So.... I thought, what would MacGyver do? He would make Jam bars of course!

(please be reminded that I'm not a food stylist!)

Blueberry Crumb Bars
Adapted from Smitten Kitchen

1 cup white sugar
1 teaspoon baking powder
3 cups all-purpose flour
1 cup cold unsalted butter (2 sticks or 8 ounces)
1 egg
1/4 teaspoon salt
Zest of 2 lemons
juice of one lemon
4 cups fresh blueberries
1/2 cup white sugar
4 teaspoons cornstarch
OR substitute about 2-2.5 cups of your favorite jam for the last 3 ingredients.

1. Preheat the oven to 375 degrees F (190 degrees C). Grease a 9×13 inch pan.
2. In a medium bowl, stir together 1 cup sugar, 3 cups flour, and baking powder. Mix in salt and lemon zest. Use a fork or pastry cutter to blend in the butter and egg. Dough will be crumbly. Pat half of dough into the prepared pan.
3. In another bowl, stir together the sugar, cornstarch and lemon juice. Gently mix in the blueberries.
4.Sprinkle the blueberry mixture (or jam+lemon juice) evenly over the crust. Crumble remaining dough over the berry layer.
5. Bake in preheated oven for 45 minutes, or until top is slightly brown. (This took an extra 10 to 15 minutes in my oven.) Cool completely before cutting into squares.


Although these blueberry bars were delicious I was still feeling defeated because of my jam fiasco and vowed to try again. The second batch was good, really good.

Blueberry Jam
10 cups/3.5 lbs blueberries (preferably fresh but frozen will do)
1/4 cup lemon juice 
1/2 cup water
4 1/2 cups sugar (more or less to taste)
1 box Pectin

Other stuff:
Jar funnel
Jar grabber
At least 1 large pot
Large spoons and ladles
10 pints sized Ball jars with new lids (can reuse rings)

1. Wash jars and lids (I prefer washing the jars in the dishwasher so they are clean and hot right before I fill them and I boil the lids for about 5 minutes)
2. Wash and toss any unripe blueberries
3. Crush the berries by using a potato masher or putting them in a food processor/blender. I prefer chunkier jam so I don't crush them too much, but the consistency is up to you. You should have about 6-6.5 cups crushed.
4. Mix the dry pectin with about 1/4 cup of sugar or other sweetener (I prefer using about 3/4 of the pectin and adding the rest at the end just to make sure I don't overdo it.)
5. Mix the blueberries with the pectin/sugar and cook to a full boil (med- high heat) stirring often.
6. Add the remaining sugar and bring to a hard boil for 1 minute.
7. Test for desired thickness by chilling a spoon in ice water then take a half spoonful of the mix and let it cool to room temperature on the spoon. If it thickens up to the consistency you like, then you know the jam is ready. If not, mix in a little more pectin and bring it to a boil again for 1 minute.
8. Fill the jars to about 1/4 in from the top and wipe away spilled jam from the top(this is where the funnel comes in handy!), then put the lid and rings on. BE CAREFUL it will be hot!
9. Place closed jars in boiling water for 5 minutes making sure that the water is about 2 inches over the top of the jar. Remove with jar tongs and let cool.
 *if the top does not "pop" within 24 hours then you it's not sealed and you will need to keep it in the fridge, otherwise the jam will remain fresh and testy for about 12 months. PLEASE read up on preserving before you try canning of any kind as there are tons of "rules" that I may not have touched on.

I know canning can seem intimidating but I promise it's easy as can be. If you have any questions at all please feel free to email me or check out the Ball website! Happy canning!

Friday, July 1, 2011

The Griswolds European Vacation

Wow! Things certainly are moving around the Caldwell house. I am graduating at the end of this month, thank goodness, and the day after my last class I am heading up to Birmingham to work for 3 weeks as a pharma rep. Weird, I know, but I am in the process of learning the products and getting trained and in a few weeks I'll be filling in until the new Birmingham rep is hired. So, if your in the Birmingham area and want to entertain me one weeknight I would be ever so grateful! After that I'll take a break then head back out into the field to fill in for our Montgomery rep while she is on maternity leave. I'm nervous but so grateful for this opportunity and I hope to make everyone proud!

So between my stints in Birmingham and Montgomery, Tyler and I are headed to Europe for 12 days!!! Woot Woot!! We are calling this my "graduation present" a.k.a. graduation, Christmas, birthday and anniversary...for a few years!

Tyler and I perfer "adventure travel" over "relaxing travel" so we are planning on jumping from city to city with only our backpacks and have found some interesting places to say. Meet Airbnb.com.... This is a website where you can list your property for travelers to rent. We found a cute little apartment in the center of Luzern where we will have our own room, bathroom and even a kitchen. And get this, it's only $110 a night!
Click on the link below to see some pics of our little place
http://www.airbnb.com/rooms/99351

We have an actual hotel for Turin, Salzburg and Zurich and we are thinking of using airbnb.com for our stays in Bologna and Bolzano simply because we will be able to meet some other travelers AND its totally in our budget. I know some of you may think we are crazy for doing this but believe me, it's safe....

Here are a few of things we want to see!

Lake Luzern, Switzerland


Vineyards in Alba, Italy (close to Turin)
http://www.virginia.edu/travelandlearn/2009wine.html

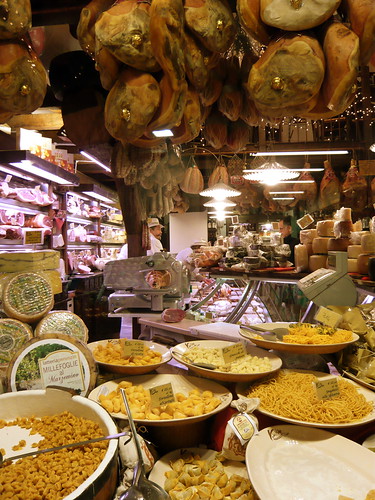
Food in Bologna and Parma, Italy

http://principiagastronomica.com/post/32

Bicycling in Bolzano (Not in the Dolomites, of course!)

http://www.art.com/products/p1866461293-sa-i4240036/ruth-tomlinson-parco-naturale-puez-odle-santa-maddalena-val-di-funes-dolomites-bolzano-italy.htm

Pretending like I am Maria from the Sound Of Music in Salzburg, Austria

http://hotels.uptake.com/blog/value-hotels-salzburg-austria-7388.html

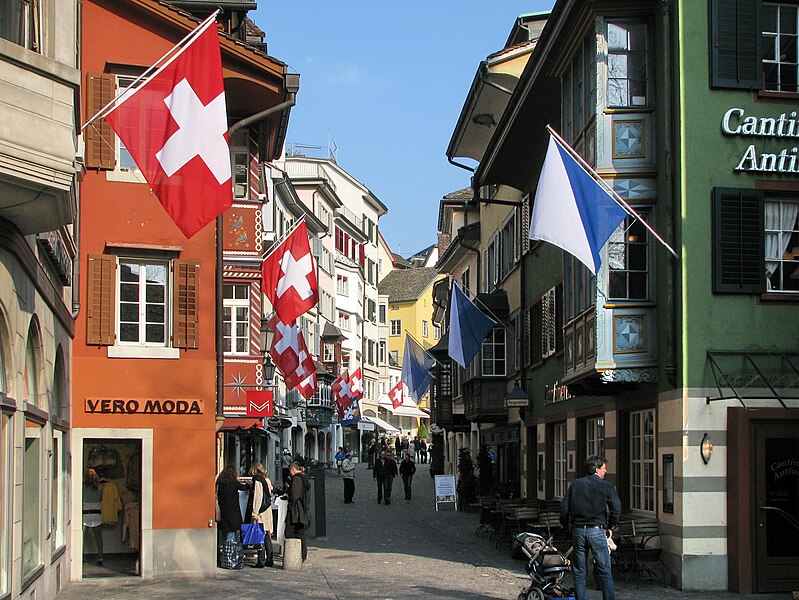
Cheese, lots and lots of cheese in Zurich, Switzerland
File:Zürich - Augustinergasse IMG 2046.JPG
http://en.wikipedia.org/wiki/Zurich

If anyone has ANY tips for us please let us know! Over and out and have a GREAT 4th of July!