Showing posts with label Food. Show all posts

Tuesday, February 19, 2013

Boyd's First Caldwell Adventure


Our idea of adventure is probably a little different than the rest of the world's. Case in point, the 2nd Annual Lee County Heritage Cake Contest. Yes, that is correct, Tyler and I both entered a cake! The recipe had to be either 100 years old or passed down through 3 generations. We both used our grandmother's recipes so we passed that test!
 
Judging Criteria:
     
  1. Appearance: Cake should be presented in its historical context as it would have been 100 years ago.
  2. Authenticity: 100 years old. Follow recipe word for word. Recipe must show original measurements.
  3. Taste-Flavor
  4. Intent of original recipe
  5. Symmetrical
  6. No suggestion of sugar crystals
  7. Layer cake should be soft and golden brown in color. (I think this one is a bit odd!)
 
Tough judges
 
 I made my grandmother's spice cake with pecan cream cheese frosting.


Tyler made his grandmothers apple cake with a cinnamon crunch topping. YUM!

Announcing the winners.......first place went to a fruit cake (really!?), second with to a blackberry spice cake with burnt caramel frosting, and third place went to ME!


Yep, that's right, Boyd and I got our picture in the Auburn/Opelika Newspaper! Our poor child is destined to be a ranging nerd but at least he will have stories to tell!


Wednesday, March 14, 2012

Grow Alabama CSA

Warning: This post may sound preachy! My bad!

Tyler and I have recently picked up a new obsession. Our country's food system. After being brain washed by a few documentaries such as Food Mattes and Food Inc. Tyler and I have finally started to realized that a lot of what our food industry is pumping into our bodies is not real food and has no nutritious value. Now don't get too excited, we are not going hard core organic or anything like that, we do have a budget after all! But we are going to try to shell out the few extra cents to buy local/natural/organic when we can. Our first step has been joining the Grow Alabama CSA program. We purchased the Bronze box for $24.75 per week (it's cheaper if you commit to a whole year) which feeds 1-2 people and yesterday I was so excited to receive our first week's box!


I picked up our box after work at Peppertree Steak and Wine but there are about 4 or 5 other pickup locations around Montgomery plus numerous others around the entire state. Almost everything is grown in Alabama with exception of a few items that are grown in the southeast due to demand. Apparently every year they lower their dependence on non-Alabama growers so it should dwindle to zero soon.

The box changes every week and you can even customize it if you hate cucumbers, like myself. Since I plan on doing a lot of growing this summer I will just customize my box to exclude those offerings that I already have in my own garden.

In this week's box:
  • 2 heads of broccoli
  • 1 large grapefruit (Tyler doesn't eat grapefruit so I don't have to share!)
  • a bunch of carrots (this was a pleasant surprise as it was not listed on the site)
  • a bag of fingerling potatoes
  • 2 zucchinis
  • 2 green bell peppers
  • a large bunch of red Russian kale ( which was delicious in my smoothie this morning)
Please consider joining Grow Alabama, they service the entire state and after adding up the cost of everything I recieved it was actually not that much more expensive than Publix plus it doesn't contain all the hormones and sprays that the grocery store stuff has. I'm not knocking Publix because it is definitely my grocery store of choice and I will continue to shop there but I will also try to do what I can to support our local hard working farmers!

Remember, you vote every time you go through the checkout line!

PS Grow Alabama is also on Facebook and FYI this does not mean that you will never see me eating crap food!

Sunday, July 10, 2011

Southern Living Night

It took me about 2 years of begging but about a month ago I finally got the coveted invite to my friend Blair's big Southern Living night. You see Blair's aunt and uncle, Betty and Bob, live in Millbrook, AL and every so often will whip up a few of Southern Living's most recent recipes and vote on the best ones. I say whip up but I mean slave over the stove for an entire Sunday. Go check out Blair's blog post and read all the details and recipes from our big night.

So in honor of Blair and her family Tyler and I tried our own little Southern Living night. Blair has given me a subscription to the magazine for about 3 years now and I every month I flip through it and mark the recipes, then quickly forget about them. Not tonight....

picture via Southern Living

Let me tell you, the Grilled Chicken with Fresh Corn Cakes in the July 2011 issue is quite tasty! Allow me to share...

Grilled Chicken with Fresh Corn Cakes
Serves 4

Ingredients

3 lemons
2 garlic cloves, pressed
1/3 cup olive oil
1 teaspoon Dijon mustard
1/4 teaspoon pepper
1 1/2 teaspoons salt, divided
3 skinned and boned chicken breasts
3 ears fresh corn, husks removed
1 tablespoon olive oil
1 (6-oz.) package buttermilk cornbread mix
1/4 cup chopped fresh basil
8 cooked thick hickory-smoked bacon slices (I crumbled mine)
2 cups loosely packed arugula

Preparation

1. Preheat grill to 350° to 400° (medium-high) heat. Grate zest from lemons to equal 1 Tbsp. Cut lemons in half; squeeze juice from lemons into a measuring cup to equal 1/4 cup.

2. Whisk together lemon zest, lemon juice, garlic, next 3 ingredients, and 1 tsp. salt. Reserve 1/4 cup lemon mixture. Pour remaining lemon mixture in a large zip-top plastic freezer bag; add chicken. Seal and chill 15 minutes, turning once. Remove chicken from marinade, discarding marinade.

3. Brush corn with 1 Tbsp. olive oil; sprinkle with remaining 1/2 tsp. salt.

4. Grill chicken and corn at the same time, covered with grill lid, 20 minutes, turning chicken once and turning corn every 4 to 5 minutes. Remove chicken, and cover. Hold each grilled cob upright on a cutting board, and carefully cut downward, cutting kernels from cob.

5. Stir together cornbread mix and 2/3 cup water in a small bowl until smooth. Stir in basil and 1 cup grilled corn kernels. Pour about 1/4 cup batter for each corn cake onto a hot, lightly greased griddle. Cook cakes 3 to 4 minutes or until tops are covered with bubbles and edges look dry and cooked; turn and cook other side.

6. Thinly slice chicken. To serve, place 2 corn cakes on each plate, top with chicken and 2 bacon slices. Toss arugula with reserved lemon mixture. Place arugula on bacon, and sprinkle with corn kernels.


Friday, July 8, 2011

The Schnozberries Taste Like Schnozberries

Well, more like the blueberries taste like blueberries! My 4th of July weekend was full of blueberries I tell you, full of um! You see, my parents have this lake house, and at this lake house are about 8 HUGE blueberry bushes. This means that every summer my mom and I wake up early before the heat sets in and pick blueberries until our faces fall off. Give us about 20 minutes and we will have about 10 cups worth, no lie.


So a few weeks ago, I decided to make some blueberry jam. Little did I know that a little pectin goes a long way, i.e. my jam was about twice as tough as a Jello shot! A non-alcoholic Jello shot of course! So.... I thought, what would MacGyver do? He would make Jam bars of course!

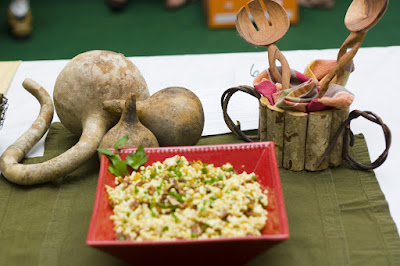
(please be reminded that I'm not a food stylist!)

Blueberry Crumb Bars
Adapted from Smitten Kitchen

1 cup white sugar
1 teaspoon baking powder
3 cups all-purpose flour
1 cup cold unsalted butter (2 sticks or 8 ounces)
1 egg
1/4 teaspoon salt
Zest of 2 lemons
juice of one lemon
4 cups fresh blueberries
1/2 cup white sugar
4 teaspoons cornstarch
OR substitute about 2-2.5 cups of your favorite jam for the last 3 ingredients.

1. Preheat the oven to 375 degrees F (190 degrees C). Grease a 9×13 inch pan.
2. In a medium bowl, stir together 1 cup sugar, 3 cups flour, and baking powder. Mix in salt and lemon zest. Use a fork or pastry cutter to blend in the butter and egg. Dough will be crumbly. Pat half of dough into the prepared pan.
3. In another bowl, stir together the sugar, cornstarch and lemon juice. Gently mix in the blueberries.
4.Sprinkle the blueberry mixture (or jam+lemon juice) evenly over the crust. Crumble remaining dough over the berry layer.
5. Bake in preheated oven for 45 minutes, or until top is slightly brown. (This took an extra 10 to 15 minutes in my oven.) Cool completely before cutting into squares.


Although these blueberry bars were delicious I was still feeling defeated because of my jam fiasco and vowed to try again. The second batch was good, really good.

Blueberry Jam
10 cups/3.5 lbs blueberries (preferably fresh but frozen will do)
1/4 cup lemon juice 
1/2 cup water
4 1/2 cups sugar (more or less to taste)
1 box Pectin

Other stuff:
Jar funnel
Jar grabber
At least 1 large pot
Large spoons and ladles
10 pints sized Ball jars with new lids (can reuse rings)

1. Wash jars and lids (I prefer washing the jars in the dishwasher so they are clean and hot right before I fill them and I boil the lids for about 5 minutes)
2. Wash and toss any unripe blueberries
3. Crush the berries by using a potato masher or putting them in a food processor/blender. I prefer chunkier jam so I don't crush them too much, but the consistency is up to you. You should have about 6-6.5 cups crushed.
4. Mix the dry pectin with about 1/4 cup of sugar or other sweetener (I prefer using about 3/4 of the pectin and adding the rest at the end just to make sure I don't overdo it.)
5. Mix the blueberries with the pectin/sugar and cook to a full boil (med- high heat) stirring often.
6. Add the remaining sugar and bring to a hard boil for 1 minute.
7. Test for desired thickness by chilling a spoon in ice water then take a half spoonful of the mix and let it cool to room temperature on the spoon. If it thickens up to the consistency you like, then you know the jam is ready. If not, mix in a little more pectin and bring it to a boil again for 1 minute.
8. Fill the jars to about 1/4 in from the top and wipe away spilled jam from the top(this is where the funnel comes in handy!), then put the lid and rings on. BE CAREFUL it will be hot!
9. Place closed jars in boiling water for 5 minutes making sure that the water is about 2 inches over the top of the jar. Remove with jar tongs and let cool.
 *if the top does not "pop" within 24 hours then you it's not sealed and you will need to keep it in the fridge, otherwise the jam will remain fresh and testy for about 12 months. PLEASE read up on preserving before you try canning of any kind as there are tons of "rules" that I may not have touched on.

I know canning can seem intimidating but I promise it's easy as can be. If you have any questions at all please feel free to email me or check out the Ball website! Happy canning!

Thursday, March 31, 2011

I Love Carbs

This week has been a marathon of studying with 2 tests last night which I am proud to say I NAILED! Accounting and Economics, you can kiss my feet!

Since most of you are probably thinking, "Sara you are obviously so smart, what can I learn from you?" I will impart some of my vast knowledge of bread making to you this morning. Ha right, I don't have vast knowledge, I have one recipe! I am not going to sit here and tell you that this bread is light and fluffy like grocery store sandwich bread but the flavor of this stuff CANNOT be beat and I will challenge you to a duel to prove it. It's great for toast, sandwiches or just sneaking as a snack but the best thing about it is that you don't need any fancy tools to make it , just your hands, some spoons, bowls and  loaf pans. It does use store bought yeast, therefore it is quick rising but I'm working on perfecting a natural yeast starter and will share it as soon as I figure out how not to kill it. On we go to the recipe...


Basic White Bread
(makes 2 loaves)
Ingredients


2 cups warm water (110 degrees F/45 degrees C)
2/3 cup white sugar (if you don't like your bread a little sweet cut some but not all of the sugar)
1 1/2 tablespoons (one packet) active dry yeast
1 1/2 teaspoons salt
1/4 cup vegetable oil
6 cups bread flour

Directions
  1. In a large bowl, dissolve the sugar in warm water, and then stir in yeast. Allow to proof until yeast resembles a creamy foam, about 5 to 10 minutes.
  2. Mix salt and oil into the yeast. Mix in flour one cup at a time. Knead dough on a lightly floured surface until smooth. Place in a well oiled bowl, and turn dough to coat. Cover with a damp cloth. Allow to rise until doubled in bulk, about 1 hour.
  3. Punch dough down. Knead for a few minutes, and divide in half. Shape into loaves, and place into two well oiled 9x5 inch loaf pans. Allow to rise for 30 minutes, or until dough has risen 1 inch above pans.
  4. Bake at 350 degrees F (175 degrees C) for 30 minutes.
Here is a quick tutorial on how to knead dough if you are new at it...


If anyone out there has a good recipe for soft and fluffy white bread please share!

Wednesday, January 19, 2011

Living off the Grid: Part 2

The dorkyness is taking over my body in the form of mustard making. As you may or may not recall, I begged for the D.I.Y Delicious cookbook for Christmas. Well Tyler made it happen and since then I have been dreaming of making my own ketchup, red wine vinegar, yogurt and such. I know, I know half of you think I'm weird but I bet the other half wants to come to my house for dinner!


I decided to start my journey by making mustard. Let me tell you, it's easy, cheap and oh so rewarding. But be warned, it's spicy!

Look-a-there, that's all you need.

Mustard
1/2 cup alcohol (wine, beer, champagne, sherry...)
1/4 cup vinegar
1/2 mustard seeds (I used yellow, the brown is EVEN spicier!)
1 tbsp finely chopped aromatics (garlic, onion, or shallots)
1 tbsp sweetener (honey, agave nectar, maple syrup, or sugar)
1 tbsp herbs (optional)
salt

Directions:
Mix all ingredients except for the salt in a non reactive bowl (ceramic or pottery), cover and let soak in the refrigerator overnight.

In blender or food processor blend to desired consistency. Add salt to taste as you blend. Store in sealed jars in the refrigerator for up to 3 months.

If you decide to give it a go, let me know how you like it!!

Tuesday, January 18, 2011

Living off the Grid: Part 1

Living off the grid, ha, yeah right! My dad is pushing Tyler and me to turn our entire football field sized back yard into a sustainable vegetable garden so when the economy failes we can live off of the land for a little while. Sorry Dad, not going to happen but I am getting closer to living like the Amish.

Our vegetable garden may be struggling (I blame the cold) but I have succeeded in making a few DIY dinnertime staples. Remember when I made cheese? Well I have added a few things to my arsenal!


A French Boule Loaf is so darn easy to make, it's considered a peasant bread because of it's lack of expensive ingredients and free form. PLEASE TRY IT, YOU CAN DO IT! It really is freakishly easy to do so jump on the granola band wagon and make some DIY bread!

Boule Loaf
Recipe adapted from Girl Versus Dough


Makes two 1-pound loaves.
Ingredients:
1.5 cups lukewarm water
2 1/4 tsp active dry yeast
2 1/4 tsp coarse salt
3 1/4 cups unsifted, unbleached, all-purpose white flour


Directions:
In the bowl of a stand mixer, pour lukewarm water (should be about 100 degrees F) and add yeast and salt to the water. Allow to proof for about 5 minutes. Add all of the flour at once and mix with the dough hook (kneading is unnecessary — just mix until ingredients are incorporated).


Once the dough is moist and consistent, pour dough into a clean, greased large bowl, cover, and let rise until doubled in size, about 2 hours.


After dough has risen, sprinkle the surface of the dough with a dusting of flour and divide dough in half. With lightly-floured hands, gently stretch the surface of each dough piece around the bottom of all four sides, rotating the ball a quarter-turn as you go. Shape until a smooth and cohesive ball and place on a lined baking sheet or baking stone. Allow each dough ball to rest about 40 minutes.


Twenty minutes before baking, preheat the oven to 450 degrees F. Place an empty broiler tray or any other lipped tray (no glass)  for holding water on any other shelf that doesn’t interfere with the bread.


Dust the tops of each loaf with flour and slash several 1/4-inch deep cuts for a “scallop” look.You can also make a tic-tac-toe pattern or a giant plus sign across the top of the bread.

 
After a twenty-minute preheat, you can put the loaves in the oven, even if it isn’t up to full temperature. Quickly and carefully pour 1 cup of hot water in the broiler tray and close the door immediately. The steam gives it it's nice crust!


Bake for about 30 minutes until a lightly-brown crust develops. Remove from the oven and allow to cool completely on a wire rack before slicing and serving.


Next time I'll tell you all about my yummy and easy home made mustard!!

Oh one more thing: I have started taking my own pictures for the blog so please have mercy, they will get worse before they get better!

Friday, December 17, 2010

Feastiveness

For the record, yes we did go with the huge colored bulbs on the tree this year. Let's just hope that the tree doesn't burn up because those suckers are hot!

On to other things...Tyler and I are the geeks that get a Christmas ornament on every vacation or trip we go on.
Here are a few of our new additions for 2010:

Charleston- March 2010
 

New York- Oct 2010

South Africa- Nov 2010


Now, the good stuff. For the past few years we have tried to come up with a small homemade gift to give out to friends and coworkers. This year was no exception and we decided to go with, drum roll please......... Cranberry and Orange Infused Vodka.


Cranberry-Orange Vodka
(recipe adapted from Michael Chiarello)

Ingredients
2 pound fresh or frozen cranberries
2 cup sugar
4 tsp vanilla extract
2 oranges, peels cut into 2-inch strips
1 (1.75 L) bottle vodka, or a handle as we call it down south!

Directions
Place cranberries, sugar and vanilla in a medium saucepan. Place pan over medium heat and stir. Simmer cranberry mixture until the berries burst, about 10 or so minutes.

Place orange peels in a 2 large glass containers with an airtight lids, or large mason jars with lids. Pour vodka over the orange peels.

Allow the cranberry mixture to cool. Pour the cooled mixture into the glass container(s). Cover tightly and set aside for 1 week. After 1 week, strain out the cranberries sand orange peels and pour mixture into a clean bottle, using a funnel. Store vodka in the refrigerator.

To serve: Pour 2 ounces of vodka mixture over ice in a tall glass and top with tonic water. Garnish with a slice of lime.


Don't worry we taste tested and it's GOOD!

PS: this is what Strongbow does all day since it has been soooo stinking cold outside!


Tuesday, November 9, 2010

Our New Cookbook

Sorry for the lack of posting but even now I don't have a lot of interesting news for you. We have been busy, but with nothing fun. I've got school and work and Tyler just has work and more work. Such is life, I suppose.

I will tell you this. Tyler bought the Food and Wine 2010 Annual Cookbook and it came in the mail on Saturday. The second it came to our door I started putting nice little yellow flags on the pages that I knew I had to come back to.


So Sunday came around and I was visited by what I think is the pink eye fairy during the night, gross I know! With that said we skipped church and headed to the grocery store instead so we could start trying out some of the recipes.

We started with the Tomato Jam recipe. It sounded so good that I had to figure out way to use it for lunch so we decided on paninis. Tyler roasted a whole chicken and caramelized some onions while I made some homemade mozzarella cheese and the Tomato Jam. We put it all on some sliced french bread with olive oil and pressed those babies until they were nice and golden brown! Delish! I realize after I had already taken a few bites that I should have had T take some pictures for the blog but it was too late. I was hungry.

Tomato Jam
28 oz can diced roasted tomatoes
1/4 c plus 2 tbsp white wine vinegar
1/4 c sugar
1 tsp mustard seeds
1/2 tsp curry powder
1/4 tsp cinnamon
pinch of ground cloves (i forgot this part)
salt and pepper to taste

 mix together in a large saucepan, simmer over medium heat, stirring occasionally until thick and jam-like. (mine took about 30 minutes but I halved the recipe)


After Tyler pulled the rest of the chicken off of the bone he dumped the naked bird into a large pot with water, carrots, onion, celery, garlic, a bay leaf, some herbs, salt and pepper and boiled it for a few hours.

Of course we had to use our wonderful homemade chicken stock for dinner, right? You guessed it. We flipped through the cookbook and found a good looking Wild Mushroom and Red Wine Risotto recipe. Again, sorry for the lack of pictures. Use your imagination.

Wild Mushroom and Red Wine Risotto
5 1/2 c chicken stock, preferably homemade or low sodium broth
2 tbsp extra-virgin olive oil  (I never measure)
1 small onion, finely chopped
salt and pepper
1 1/2 c arborio rice
1/2 c red wine
1 minced shallot
1 lb sliced wild mushrooms ( I used sliced baby portabellas, on sale at Publix)
1/2 c grated parm cheese ( I don't measure)
1 tbsp unsalted butter

1. In saucepan bring stock to a simmer, cover and keep warm over low heat.
2. In large saucepan, heat oil, add onion and season with salt and pepper, cook over moderate heat until softened.
3.  Add rice and cook for 1 minute, stirring to coat with oil.
4.  Add wine and stir until all of the wine is absorbed.
5. Add one cup of stock to rice and cook until absorbed, stirring constantly.
6. Continue to add 1/2 c stock at a time until absorbed.
7. Risotto is done when rice is slightly al dente and has yielded a thick, creamy sauce. (mine took about 20 minutes or so)
8. While rice is cooking, cook minced shallot and mushrooms in a skillet with oil until soft. Add to rice when risotto is finished cooking.
9. Stir in cheese, butter (I omitted) and parsley for garnish and serve.

Enjoy and happy Tuesday!

Tuesday, October 12, 2010

And the Winner is.....


Me!!! Well, okay 2nd place winner but close enough. And no, second place is not the first place loser so don't even try to bust my bubble!

So in case you missed it, Tyler and I both entered dishes in the Alabama National Fair's "Cooking with Pecans" competition on Sunday. Let me tell you, I was nervous. There were 35 total entrants; however, there were only about 15 in our main dish category. These people were serious and I'm not so sure how excited everyone was to have a first timer pick up the big red ribbon.  Unfortunately, Tyler's butternut and pecan stuffed ravioli didn't place but I really think it was better than mine by a long shot. I'm blaming it on the fact that the judges were all women and went for the lighter dishes. Get a man up there and he would have thought my dish was for sissies!


The winning dish, Isreali Couscous Salad with Pecans and Golden Raisins


Although I wish Tyler could have won instead of me, I was very proud. Don't worry, we will be back next year!

Israeli Couscous Salad with Pecans and Golden Raisins
Salad:
2 c Israeli couscous, uncooked
4 c chicken broth or water
1 c golden raisins
1 c toasted pecans roughly chopped
2 scallions, chopped
2 c chopped rotisserie chicken

Dressing:
3 tbsp canola oil
2 tbsp white wine vinegar
Zest of an orange
Juice of 1⁄2 an orange
1⁄2 tsp turmeric
1⁄2 tsp dried thyme
1⁄2 tsp curry powder
Salt and pepper to taste

Directions:
1. Bring chicken stock or water to a boil, and add the couscous. Reduce heat to a simmer and cook covered for 8-10 minutes or until slightly al dente. Drain and set aside.

2. In a small bowl, whisk together the canola oil, vinegar, orange zest and juice, spices and salt and pepper.

3. In a large bowl, combine the couscous, golden raisins, chicken, pecans and scallions. Pour dressing over and toss to combine.

4. Garnish with scallions and pecans and serve immediately or chill in fridge for a few hours (if chilling in fridge, mix in pecans and add garnish before serving).

*If you want a bit more flavor, double the dressing.

Friday, October 8, 2010

Chef BoyarT


Tyler has done it! He has perfected the art of ravioli! I'll back up; being the brilliant woman that I am, I bought Chef T the pasta attachment for his Kitchen Aid Mixer for our first Christmas together. Since then he has gotten pretty good at making fresh pasta. We have tried butternut squash ravioli a few times and they always come out tasting like Heaven; however, they look pretty pathetic since we were cutting them all by hand! Until this little gadget found it's way into our kitchen.
Last night Tyler made some spinach and ricotta stuffed ravioli with a red sauce and I must say they were pretty good. This gadget made sure they all were a uniform size and had just the right about of filling. Our only hurdle now is figuring out a way to drain them without them sticking together too much. Ask Lauren if they were any good considering we sent her home with a stockpile!

In case you were wondering, pasta is pretty easy to make and you don't need anything fancy if you have the patience and space to roll it out very thin. Give it a try and let me know what you think.

Here is a good video on how to make pasta if you are interested.
A few comments regarding the video:
  • we use a food processor to mix our dough
  • don't worry about the fancy flour
  • don't worry if you don't have a machine, use a rolling pin
Happy Friday!