Monday, January 31, 2011

My Mother, the Artist

Mom had an art show about 2 weeks ago and it was a HUGE success! She sold 12 out of the 15 that she submitted so I guess that means that I will be getting a nice birthday gift this year! I kid, I kid. We are all very proud!


Check out all those red dots! SOLD!

Wednesday, January 26, 2011

Tyler Caldwell Photography


Tylers blog is up and I just can't help but brag on my talented husband! I know, that was a big cheese moment so you can vomit now if you need to!

Here is a sample of my current favorites:


Wednesday, January 19, 2011

Living off the Grid: Part 2

The dorkyness is taking over my body in the form of mustard making. As you may or may not recall, I begged for the D.I.Y Delicious cookbook for Christmas. Well Tyler made it happen and since then I have been dreaming of making my own ketchup, red wine vinegar, yogurt and such. I know, I know half of you think I'm weird but I bet the other half wants to come to my house for dinner!


I decided to start my journey by making mustard. Let me tell you, it's easy, cheap and oh so rewarding. But be warned, it's spicy!

Look-a-there, that's all you need.

Mustard
1/2 cup alcohol (wine, beer, champagne, sherry...)
1/4 cup vinegar
1/2 mustard seeds (I used yellow, the brown is EVEN spicier!)
1 tbsp finely chopped aromatics (garlic, onion, or shallots)
1 tbsp sweetener (honey, agave nectar, maple syrup, or sugar)
1 tbsp herbs (optional)
salt

Directions:
Mix all ingredients except for the salt in a non reactive bowl (ceramic or pottery), cover and let soak in the refrigerator overnight.

In blender or food processor blend to desired consistency. Add salt to taste as you blend. Store in sealed jars in the refrigerator for up to 3 months.

If you decide to give it a go, let me know how you like it!!

Tuesday, January 18, 2011

Living off the Grid: Part 1

Living off the grid, ha, yeah right! My dad is pushing Tyler and me to turn our entire football field sized back yard into a sustainable vegetable garden so when the economy failes we can live off of the land for a little while. Sorry Dad, not going to happen but I am getting closer to living like the Amish.

Our vegetable garden may be struggling (I blame the cold) but I have succeeded in making a few DIY dinnertime staples. Remember when I made cheese? Well I have added a few things to my arsenal!


A French Boule Loaf is so darn easy to make, it's considered a peasant bread because of it's lack of expensive ingredients and free form. PLEASE TRY IT, YOU CAN DO IT! It really is freakishly easy to do so jump on the granola band wagon and make some DIY bread!

Boule Loaf
Recipe adapted from Girl Versus Dough


Makes two 1-pound loaves.
Ingredients:
1.5 cups lukewarm water
2 1/4 tsp active dry yeast
2 1/4 tsp coarse salt
3 1/4 cups unsifted, unbleached, all-purpose white flour


Directions:
In the bowl of a stand mixer, pour lukewarm water (should be about 100 degrees F) and add yeast and salt to the water. Allow to proof for about 5 minutes. Add all of the flour at once and mix with the dough hook (kneading is unnecessary — just mix until ingredients are incorporated).


Once the dough is moist and consistent, pour dough into a clean, greased large bowl, cover, and let rise until doubled in size, about 2 hours.


After dough has risen, sprinkle the surface of the dough with a dusting of flour and divide dough in half. With lightly-floured hands, gently stretch the surface of each dough piece around the bottom of all four sides, rotating the ball a quarter-turn as you go. Shape until a smooth and cohesive ball and place on a lined baking sheet or baking stone. Allow each dough ball to rest about 40 minutes.


Twenty minutes before baking, preheat the oven to 450 degrees F. Place an empty broiler tray or any other lipped tray (no glass)  for holding water on any other shelf that doesn’t interfere with the bread.


Dust the tops of each loaf with flour and slash several 1/4-inch deep cuts for a “scallop” look.You can also make a tic-tac-toe pattern or a giant plus sign across the top of the bread.

 
After a twenty-minute preheat, you can put the loaves in the oven, even if it isn’t up to full temperature. Quickly and carefully pour 1 cup of hot water in the broiler tray and close the door immediately. The steam gives it it's nice crust!


Bake for about 30 minutes until a lightly-brown crust develops. Remove from the oven and allow to cool completely on a wire rack before slicing and serving.


Next time I'll tell you all about my yummy and easy home made mustard!!

Oh one more thing: I have started taking my own pictures for the blog so please have mercy, they will get worse before they get better!

Friday, January 14, 2011

From Hoarding to Quilting

I am a hoarder. There I said it. Don't worry though; I'm not the kind that you see on TV I really only hoard a few things.

 
Such as:
  1. Wedding invitations
  2. Fabric scraps
  3. Tupperware
  4. Shoes
  5. T-shirts

 
The last one is the worst. I CAN NOT throw away a t-shirt. I mean come on, a lot of them have sentimental value and I would bet that a lot of you can't throw them away either. So I decided to take action and put together a plan for my first t-shirt quilt. Don't worry I don't plan on proudly displaying it on the sofa or guest bed; it is currently neatly folded and placed in our linen closet for my unborn child to snuggle with.


Here are some good instructions on how to make a t-shirt quit; however, I changed a few things:
  1. No fancy borders for me.
  2. I cut my squares to 15 inches by using a clear plastic quilt square and cutting around it with a rotary cutter.
  3. I used 20 shirts, 4 across and 5 down, since I was not to worried about it needing to fit as a bedspread.
  4. For my backing I used 2 kinds of cute flannel fabric. Both are polka dots with the similar colors but different scales. Since most of the fabrics that are soft enough for a blanket are only 48 inches wide I had to buy 2.25 yards of each and piece them together lengthwise.
If you are interested in making one and could use a little help just just let me know and I'll try to answer any questions you have!  

Tuesday, January 11, 2011

Just Like Botox!

The pillows are donezo so I have succeeded in giving my family room a little temporary cosmetic procedure! Nothing big, just something to make it feel a little better about it's self. I wish they were bigger and fluffier but that is what I get for buying them on sale at Hancock Fabrics. Whatever, they will do for now. Next stop: learn to make pillows with zippers. I need to option of switching the covers out when I get sick of them; which I can guarantee will happen.

Before:

After:


Another tiny project that I finished in about 15 minutes on Monday's "OMG there is going to be an ice storm you don't have to come in to work, oh wait I changed my mind you have to come in at noon" morning off was trying to update the look of this little beauty.


It was Tyler's late grandmother's sewing stool and I decided I needed to add it to my collection. I both painted and recovered my other one but I decided to take the lazy route and just cover this one.


If you don't have a sewing stool, get one. They are so worth the $10 at most flea markets and serve as a great looking junk drawer for any room!

Friday, January 7, 2011

Pillowpalooza 2K11

I love making pillows. I think it mostly stems from the fact that I'm cheap and it's not super hard to sew 2 squares of fabric together, so there ya go.

Over the holidays I was a sewing machine, no pun intended, and knocked out my t-shirt quilt project that I have been working on for months. While sitting on my sofa trying my hardest to hand tie an entire quilt, I realized how darn generic my family room looks.

Exhibit 1: a big ole brown couch (snooze alert)
Exhibit 2: beige and brown/beige pillows that came with the sofa, gross
Exhibit 3: ugly fabric on our club chairs that I picked out from a book of ugly fabrics at an ugly furniture store ( I won the chairs in a sweepstakes so I shouldn't complain)

Soooo.. I took it upon myself to order some fabric that will hopefully blend in with the sea of beige yet add a little life to the place.
I know this one is still beige but the yellow blends well with the ugly fabric on the chairs

This pattern is actually huge. I think I'm going to center the red circle on the pillow and do a solid on the back.

Cost Breakdown:
4- 18x18 inch feather pillow inserts: $40.76
2 yards fabric: $21.75

That comes to about $15.50 per pillow which is a heck of a lot cheaper then buying the super cute, yet pricey pillows from Etsy that don't even come with the insert.

Thoughts? Am I still too beige? You can tell me the truth, the fabric was a good deal and I'll end up using it for something else if this doesn't work out!

Oh, and I bought a yard of this just for the heck of it! I'm thinking I might use it to cover my new sewing stool.

Wednesday, January 5, 2011

South Africa: The Fnal Installment

Okay so I guess most of you are totally over seeing pictures of my vacation but I said I would do it so here is he last bit.

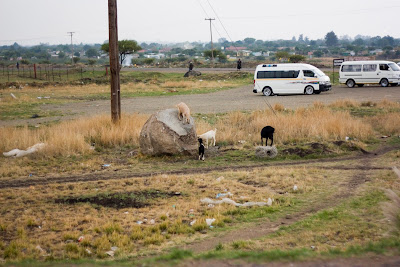
12 hours....that is how long it took for us to get from Pilanesberg to Durban! That is a long time to sit in a 15 passenger non air conditioned van, thank goodness for beautiful scenery, lots of snacks and rest stops with trampolines and petting zoos!


King of the Hill, Billy Goat style


Once we got to the Zimbali Resort the real relaxing began! We played by the pool, raced in the golf cart, chased the monkeys who stole the fruit from our drinks, and enjoyed all of the wedding festivities!

Our awesome house!


And the biggest thank you goes to the beautiful bride who not only planned a fabulous wedding but the best vacation to date!


*Thanks to Brandon and Kate for letting me steal some pictures!

Saturday, January 1, 2011

South Africa: Part 2

What's my new years resolution you ask? Not to be a lazy chump and start being a better blogger!

I know, I know we have been back from South Africa for over a month and I am just now posting the safari pictures.

Here goes....

After our few days in Johannesburg we drove about 6 hours north  to Pilanesberg National Park (disclaimer: for the normal traveler it will take 2 hours, but we like stops). We stayed at Buffalo Thorn Lodge in the Black Rhino Game Reserve and I must say, other than the wedding of course, it was the highlight of our trip!
We got up at 5:00 am every morning for a 5 hour game drive, then relaxed by the pool until it was time for our evening game drive.

According to our game driver, were were EXTREMELY lucky to see all that we did and that our next trip will most likely suck because it will never be that good again! Kind of a downer but still cool!

Here are a few pictures of our 6 hour journey, the lodge and the animals.

Brandon got "iced", google it...

Grocery stores are so much fun in foreign countries! We went overboard but don't worry the dollar goes pretty far over there!

15 passenger van, no air conditioner, long drive....


Impalas EVERYWHERE!


The first of the "Big Five" (called the Big Five because they are the 5 most dangerous animals to hunt)


Big 5- White Rhino

 Big 5- African Buffalo


Big 5- Leopard


 More Impala


 Our room

 The most amazing outdoor shower to date.


 We could see the animals from our pool deck

 Big 5- Lion


 It's Pumba!


 Springbok- Yummy!

 Hippo


Happy New Year! Pictures from the beach are next...